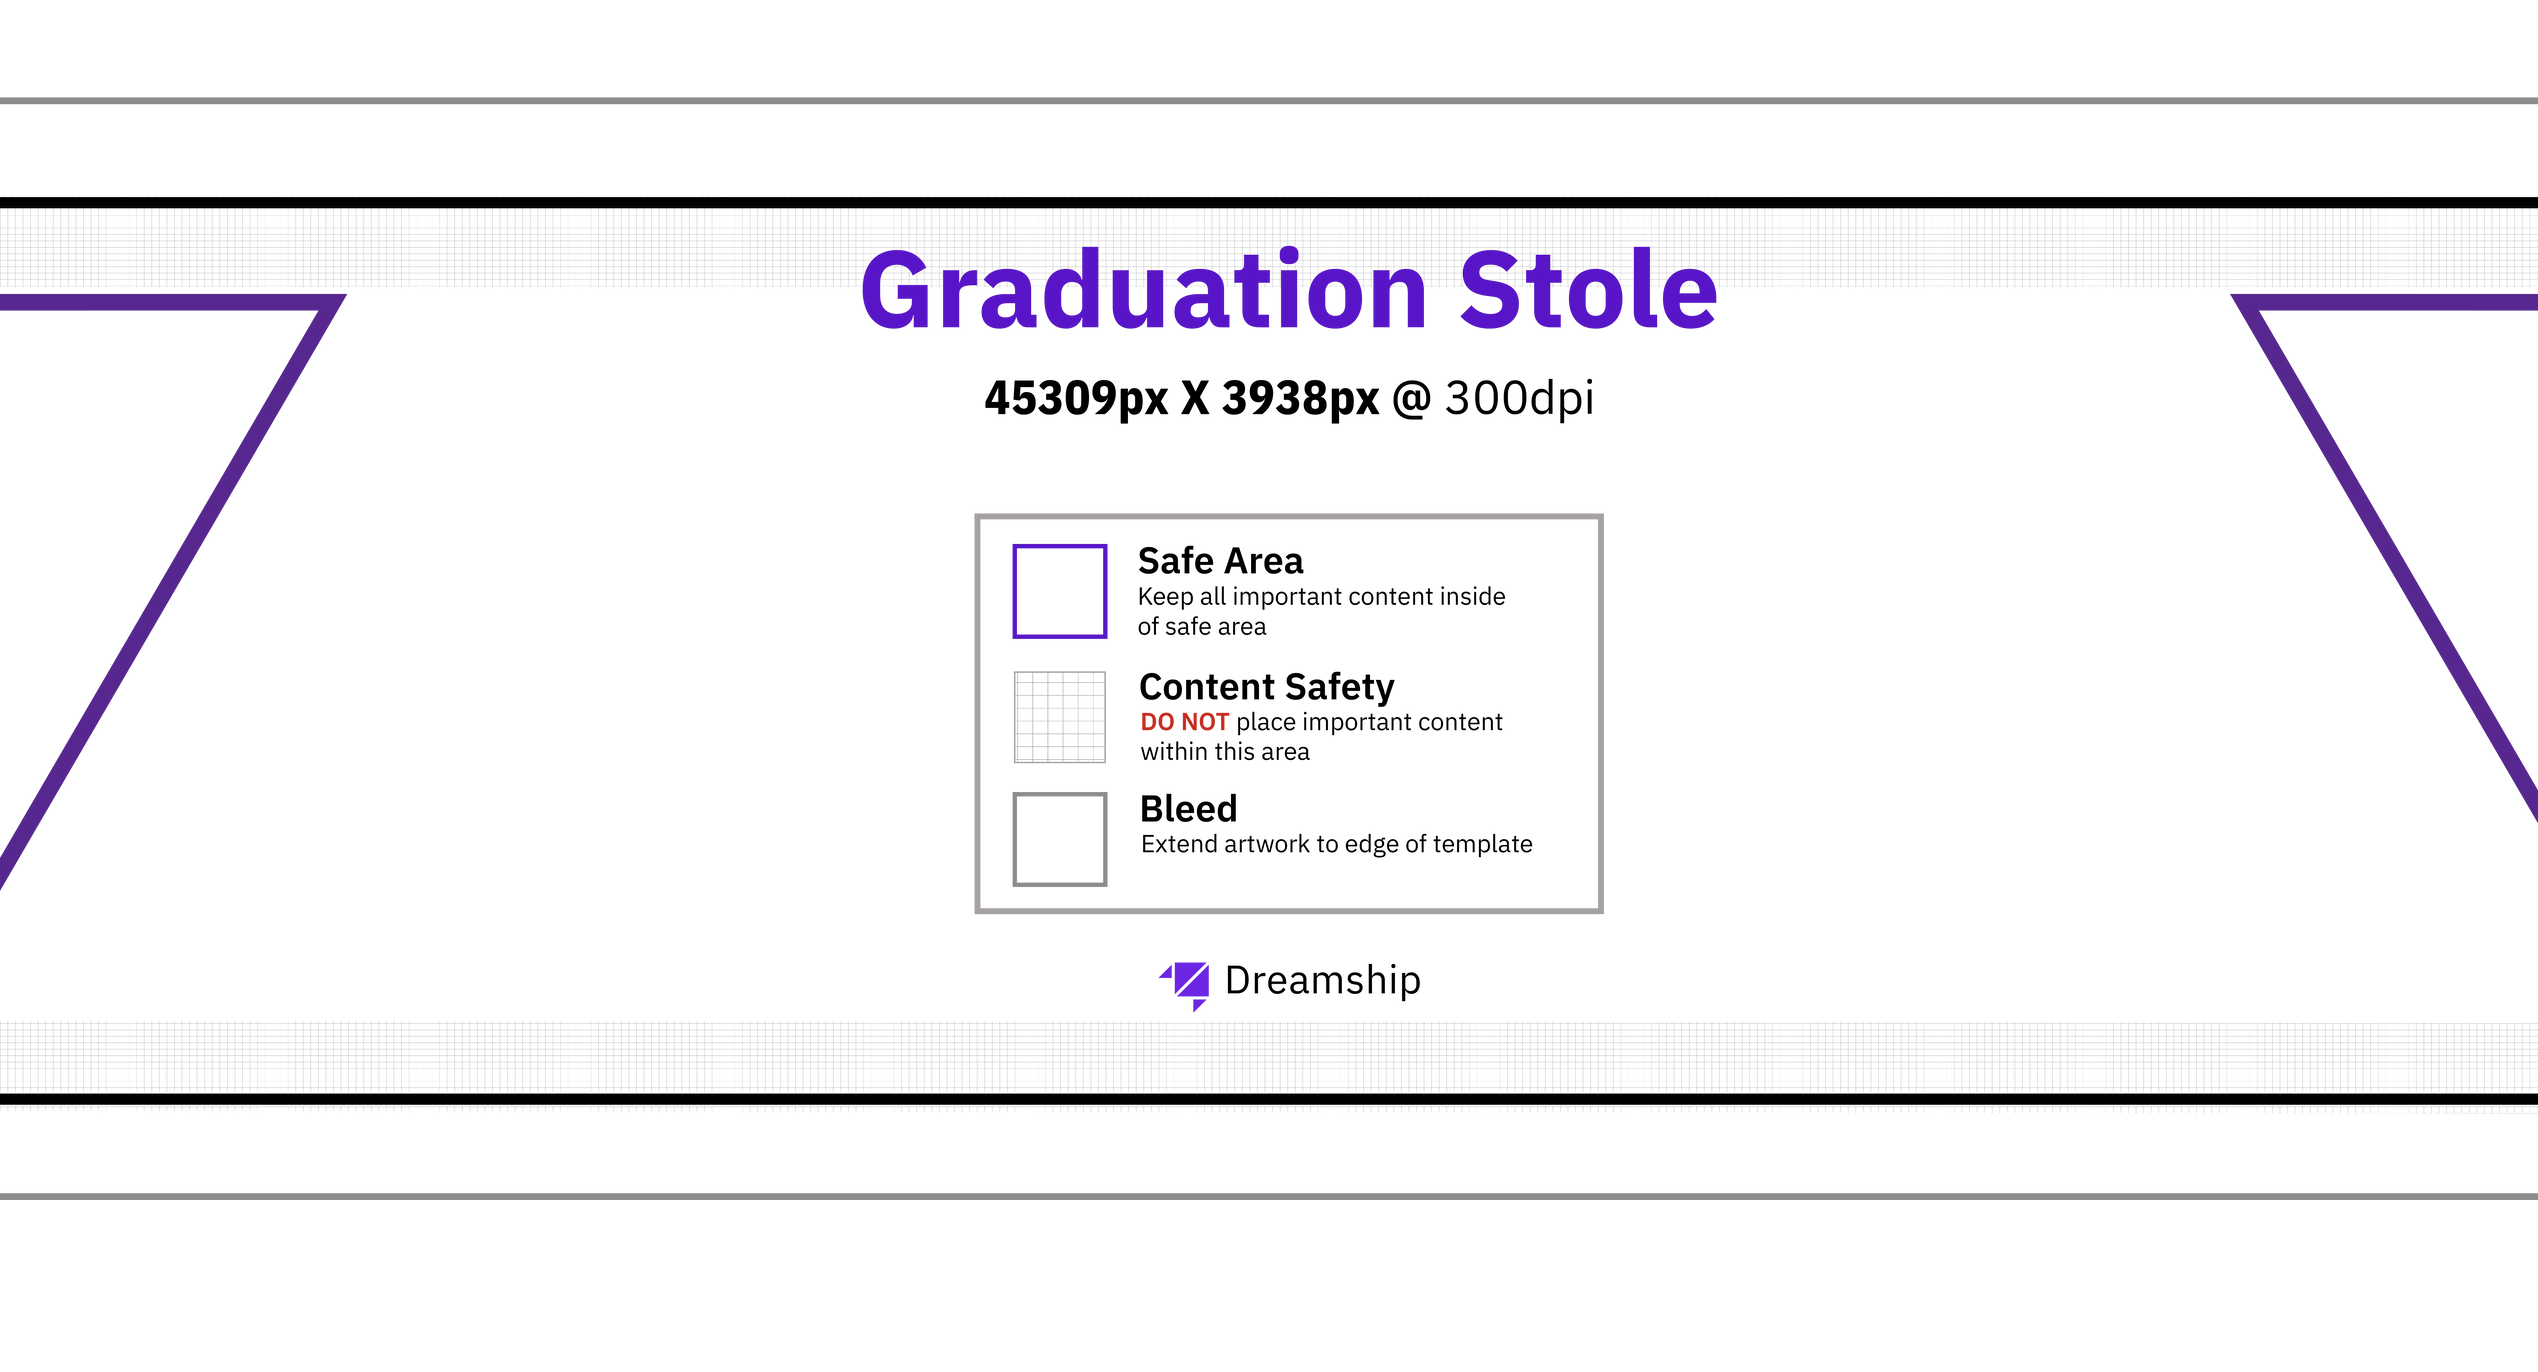
1. Important Specifications
- Standard File Size:
45,309px×3938px - Optimal Resolution:
300 DPI - File Format: PNG / JPEG
- Template Design File: Download Dreamship's reference template here.
- Note: The template is stretched out horizontally, including both the Left Side and Right Side connected via the back neckline.
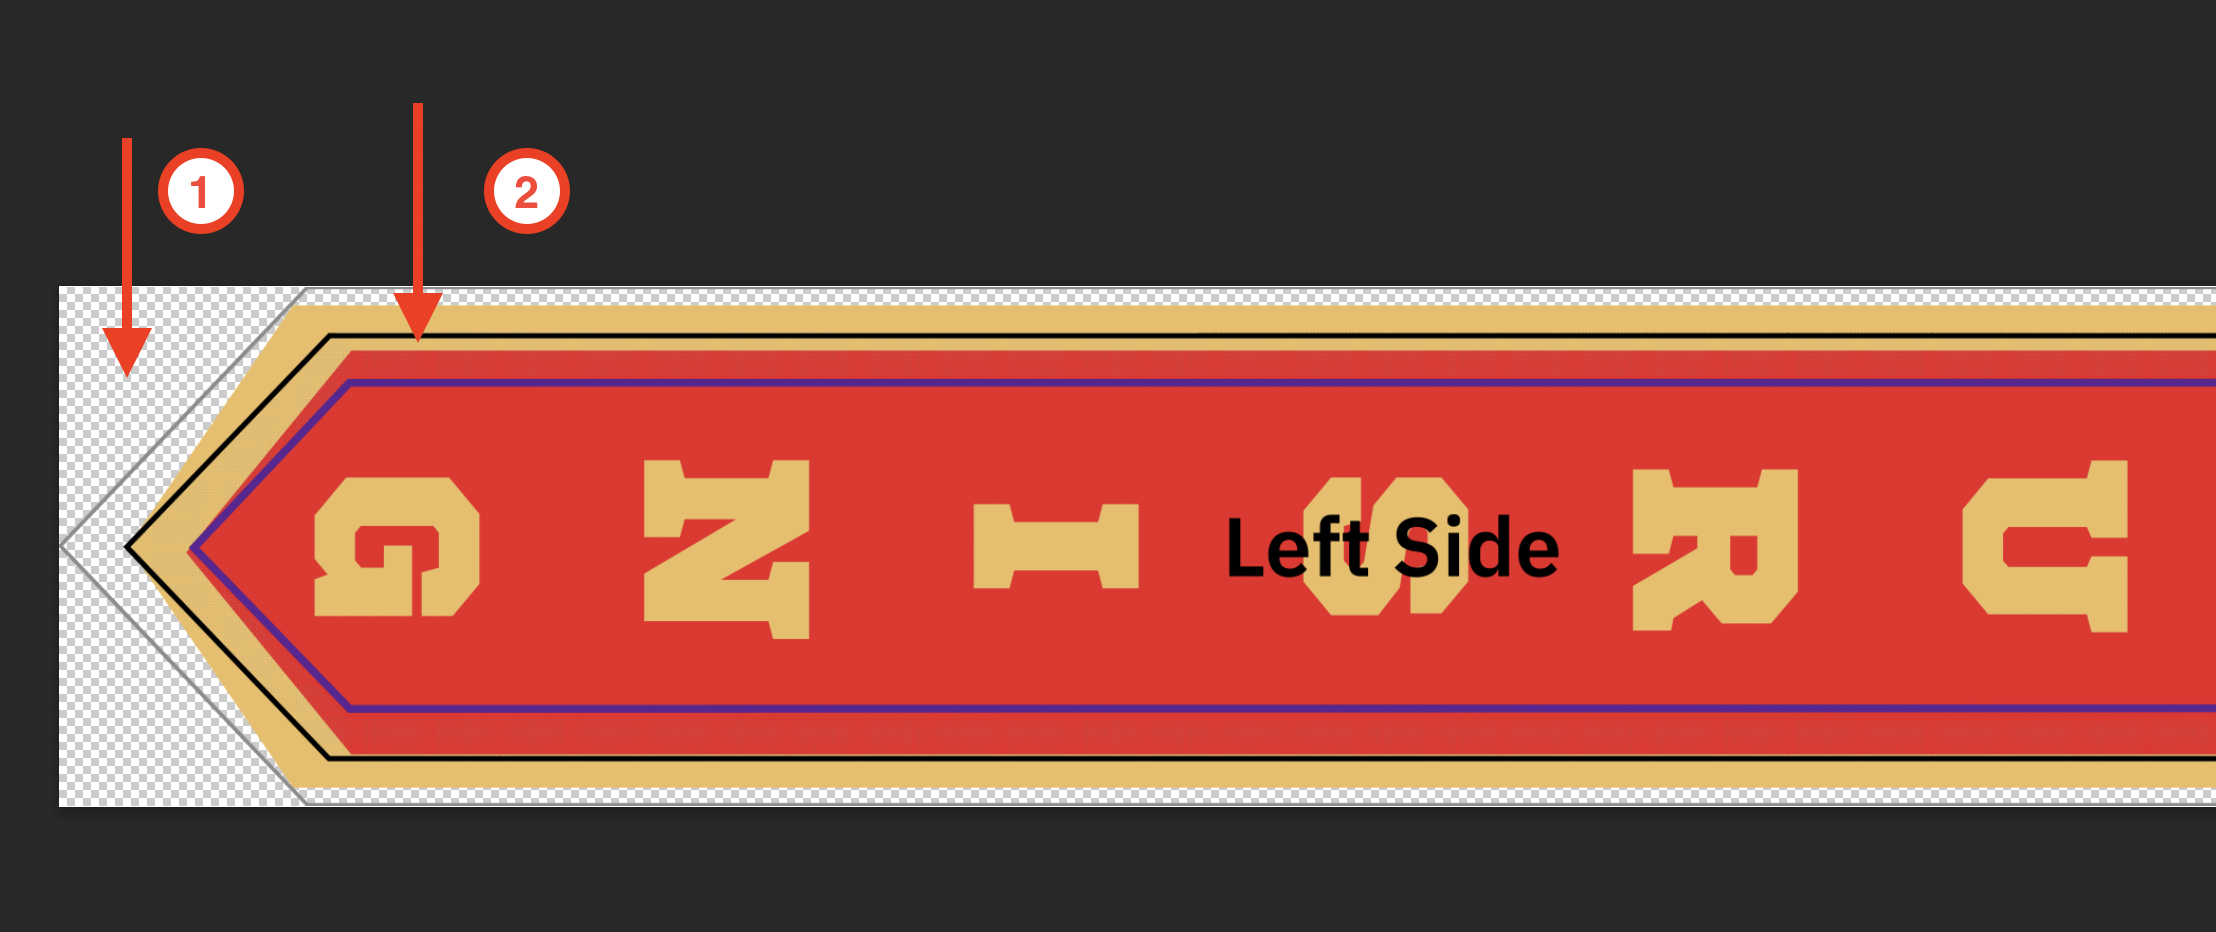
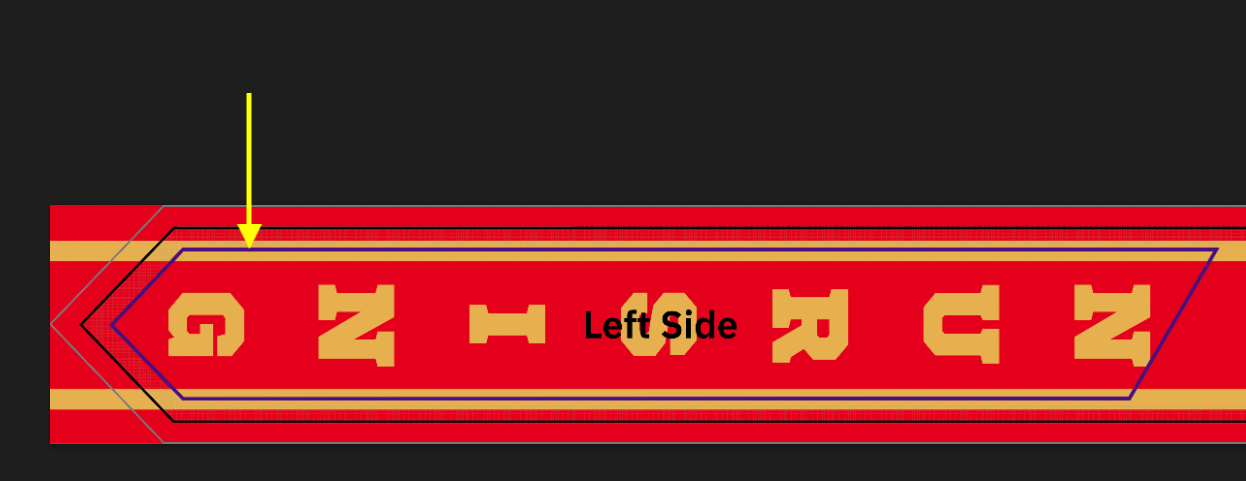
2. Understanding the Template Layout (3 Crucial Lines)
When opening Dreamship's alignment template, you will need to understand 3 critical boundary lines before starting your design:
- 🟪 Safe Area — Purple Line: All critical content (text, logos, graduation year, school names) MUST be placed entirely within this area. Any content placed outside the purple line risks being cut off during production.
- ⬛ Cut Line — Black Line: This is the actual finished dimension of the product. The cutting machine will cut precisely along this black line.
- 🏁 Bleed Area — Outermost Edge: The safety buffer at the outermost edge. This area MUST be fully covered with a background color or pattern — never leave it empty.
⚠️ Common Mistake: Missing Bleed Coverage If your background color or pattern only goes up to the Cut Line without extending into the Bleed Area, even a 1mm shift of the cutting machine will expose the unprinted white fabric on the final product — directly impacting product quality.
3. Standard Design Practices For Each Version
A. Solid Background / Pattern (No Border)
- ✅ DO: Fill your background color or pattern to cover 100% of the entire template, extending past the Cut Line and filling the Bleed Area completely.
- ✅ DO: Keep text, logos, and all important content within the Safe Area (purple line).
- ❌ DON'T: Do not leave the Bleed Area empty or transparent at the edge of the file.
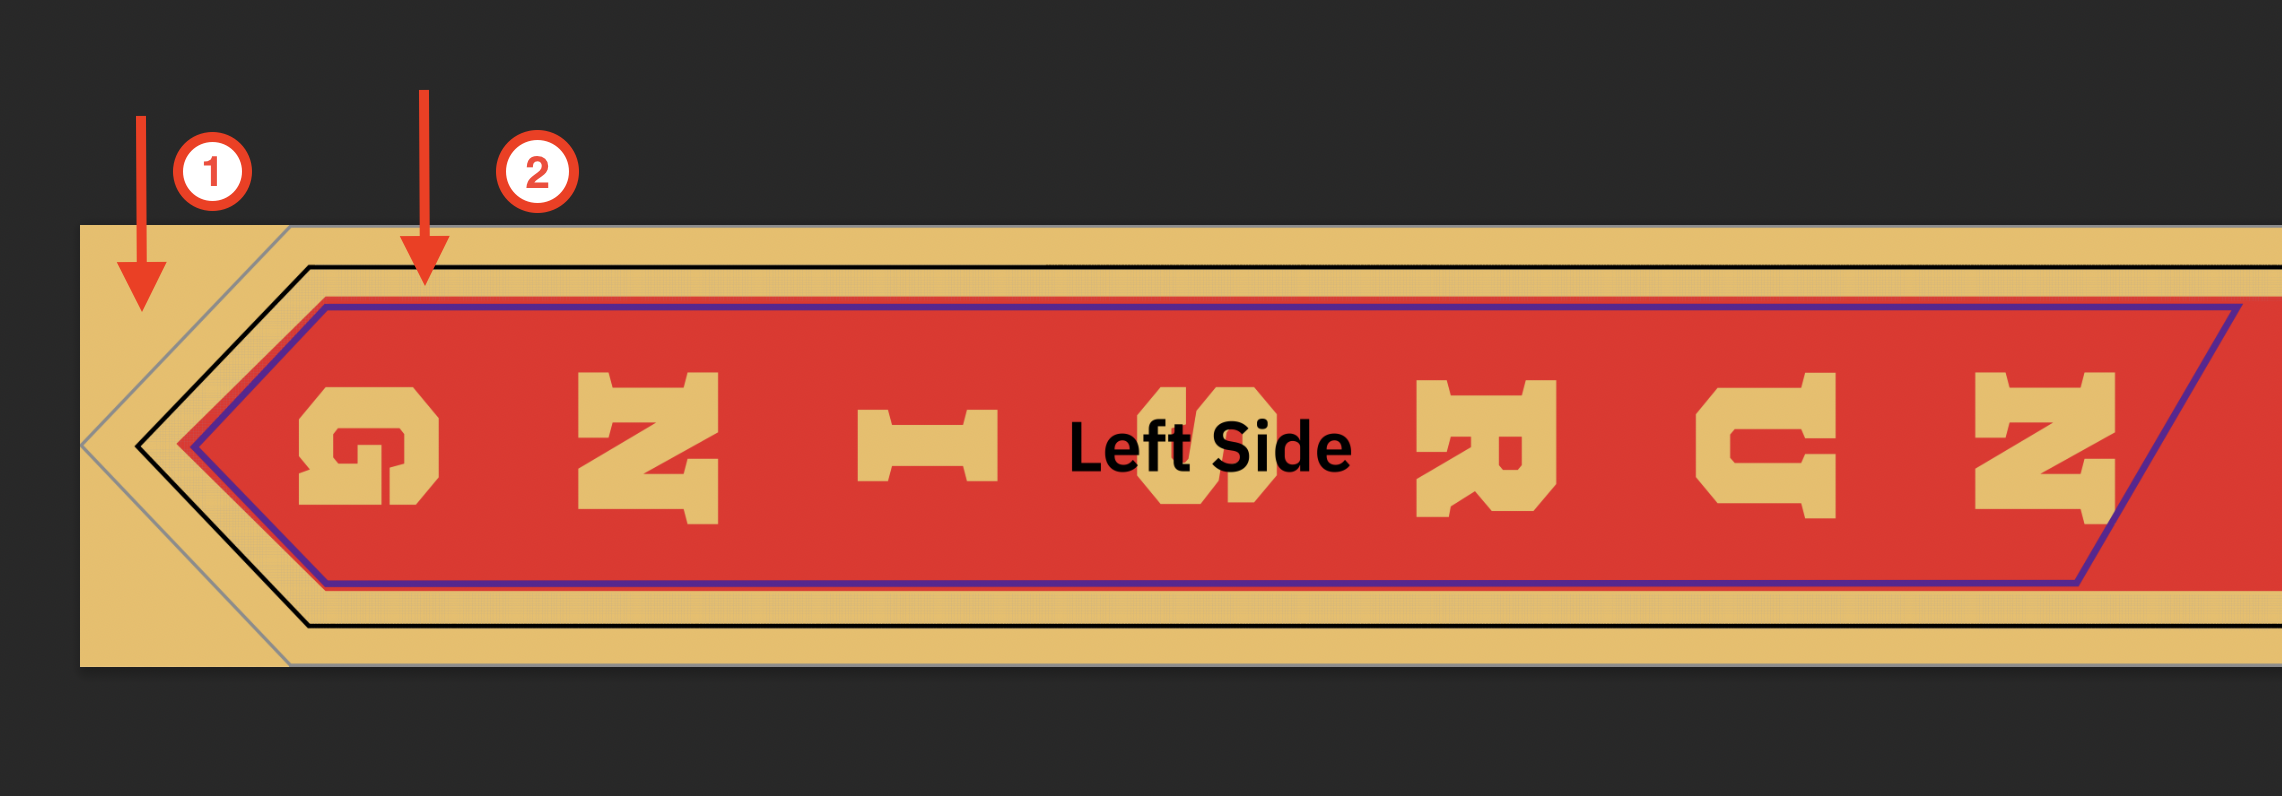
B. Single Border Design
How actual border thickness is measured: The visible border thickness on the finished product is measured from the Purple line (Safe Area) to the Black line (Cut Line). The color you extend past the black line (into the Bleed Area) will be cut off — but this acts as a safety buffer so the border doesn't lose color if the cutting machine shifts.
❌ DON'T — Risk of Shift & White Edge Exposure:
- ① Bleed Area is empty — no background color fills in; it shows as transparent (checkerboard).
- ② Gold border stops exactly at the Cut Line — if the machine shifts even a few mm, the white fabric edge will be exposed on the final product.
📸 Actual Mockup (DON'T):

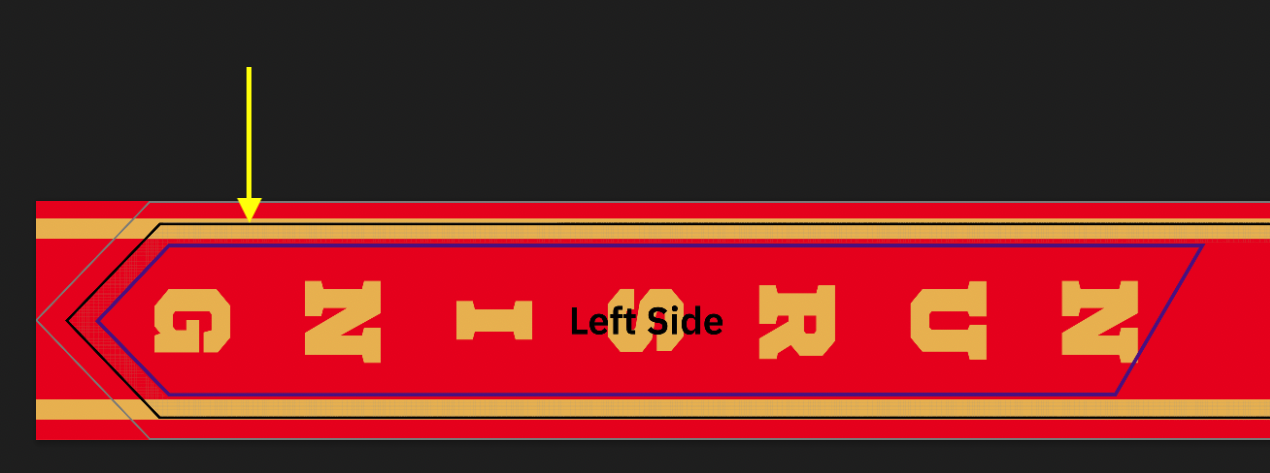
✅ DO — Correct Standard:
- ① Background color fills the entire Bleed Area — no empty space at the file edge.
- ② Gold border extends past the Cut Line into the Bleed Area — no matter which direction the machine shifts, the border on the final product remains even and fully colored.
📸 Actual Mockup (DO):

C. Double Border Design
When using two nested border layers, each layer must be placed in the correct zone — not all layers should extend to the Bleed Area:
- Inner border (e.g., a small gold stripe in the middle): Must be placed entirely within the Safe Area (between the 2 purple lines). This border must NOT touch or cross the Cut Line.
- Outer border (the wider border closest to the edge): Must extend past the Cut Line and fill the Bleed Area — apply the same rule as the single border design above.
❌ DON'T — Double Border Error:
- Gold arrow: The gold inner border is placed at the wrong position — sitting at the Cut Line instead of being centered inside the Safe Area. If the cutting machine shifts slightly, this border layer will be completely lost on the actual product.
📸 Actual Mockup (DON'T):

✅ DO — Correct Double Border:
- Gold arrow: The gold inner border is correctly centered between the 2 Safe Area (purple) lines, not touching the Cut Line. The outer red border extends past the Cut Line into the Bleed Area — ensuring both border layers display correctly on the finished product.
📸 Actual Mockup (DO):