Feature Description:
This feature allows users/teams to publish products & associate orders to specific shops. It is the best way to categorize both products and orders created in the app and via the API. There are two major types of shops; Custom Shops & Shopify Shops.
In This Section:
-
How to Create Custom Shops
-
How to Edit Custom Shops
-
How to Connect a Shopify Shop
-
How to Publish Products to Shops
-
How to View Products & Orders by Shop
Use Cases:
Custom Shops
-
E-commerce - Create custom shop objects for different e-commerce stores across the web (i.e. Etsy, Amazon, WooCommerce, etc.) and organize your products and orders accordingly.
-
Channel Partners (corporate) - Create custom shops to represent your clients. Publish products designed for specific clients and associate orders for specific clients to their respective client shops. Via the API, you can pull shop data into your system and categorize products into unique client catalogs.
-
Channel Partners (music) - Create custom shops to represent your artists. Publish products designed for specific artists and associate orders for specific artists to their respective artist shops. Via the API, you can pull shop data into your system and categorize products into unique artist catalogs.
Shopify Shops
-
By integrating your Shopify shop(s) with Dreamship, you will be able be able to both seamlessly publish products directly to Shopify as well as fulfill orders as they come in. Additionally, when your order has been fulfilled, Dreamship will automatically transmit fulfillment data (i.e. tracking number) to Shopify and trigger an end-customer notification.
How to Create Custom Shops
Relevant Definitions:
-
Name - The name of your shop. Used to identify your shop in the app.
-
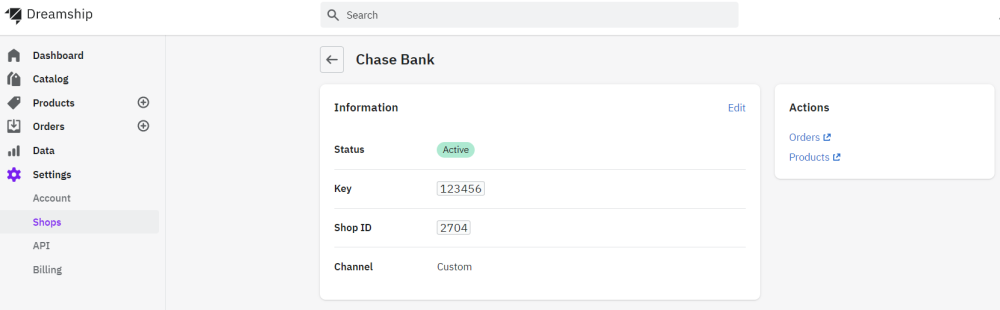
Key - A unique key that you can assign to your shop that may or may not correspond with your own internal data.
-
i.e. if your shop if going to correspond with a unique catalog in your system you can apply that same unique identifier in the “Key” field
-
-
Shop ID - A unique identifier that is auto generated by Dreamship upon creation of a shop.
-
Any orders that you want to associate with a shop must be explicitly set in either the API or the CSV creation process using the shop_key .
-
-
Status - A value that users/teams can use to notate whether a shop is active or inactive.
How to Create Custom Shops:
-
Click “Settings”
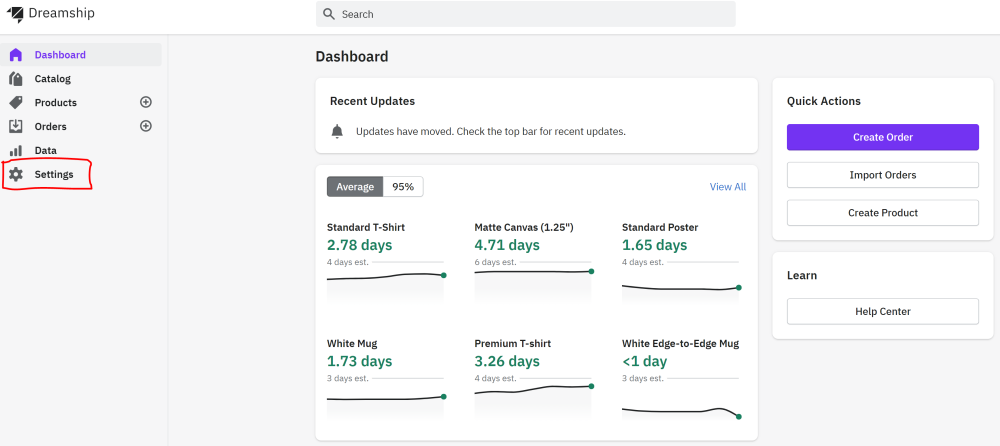
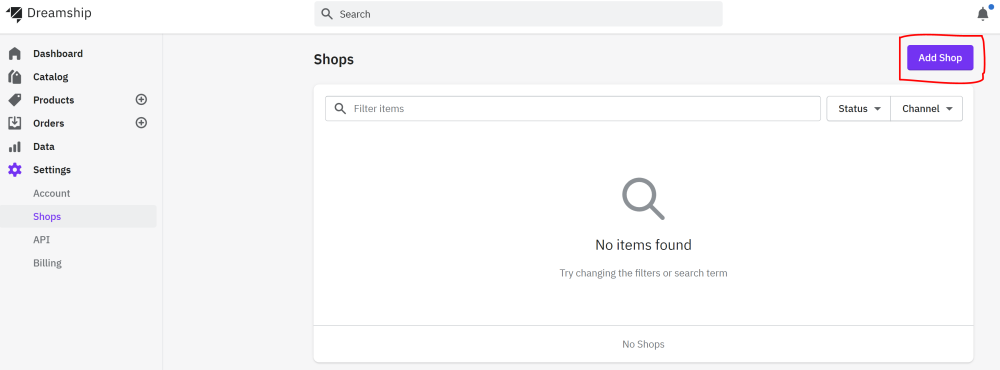
2. Click “Shops”

3. Click “Add Shop”
4. Click “Custom”
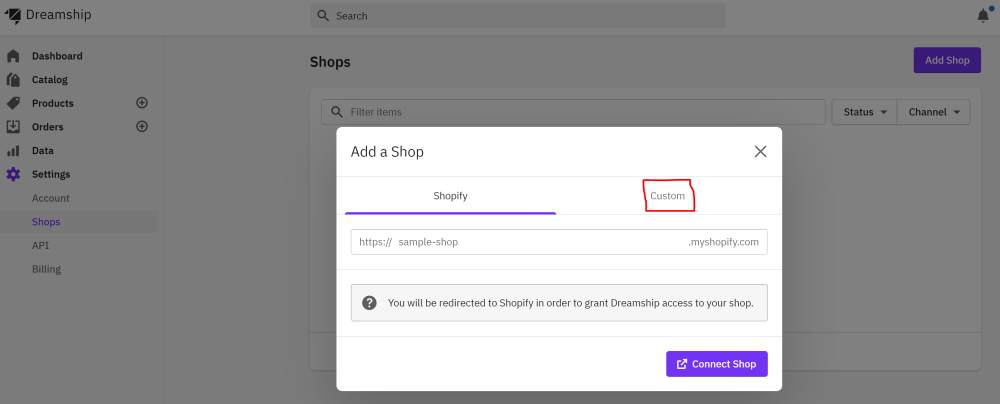
5. Name your shop, enter a Key for your shop & click “Add Shop” *Note - see above “Relevant Definitions” if you have questions regarding Names & Keys.

6. Shop will now be created using the Names & Keys you entered. Shop ID will be auto generated.
How to Edit Custom Shops
Relevant Definitions:
-
Name - The name of your shop. Used to identify your shop in the app.
-
Key - A unique key that you can assign to your shop that may or may not correspond with your own internal data.
-
i.e. if your shop if going to correspond with a unique catalog in your system you can apply that same unique identifier in the “Key” field
-
-
Shop ID - A unique identifier that is auto generated by Dreamship upon creation of a shop.
-
Any orders that you want to associate with a shop must be explicitly set in either the API or the CSV creation process using the shop_key .
-
-
Status - A value that users/teams can use to notate whether a shop is active or inactive.
How to Edit Custom Shops:
-
Click “Settings”

2. Click “Shops”

3. Click desired shop Note - you can search for specific shops using the search bar

4. Click “Edit”
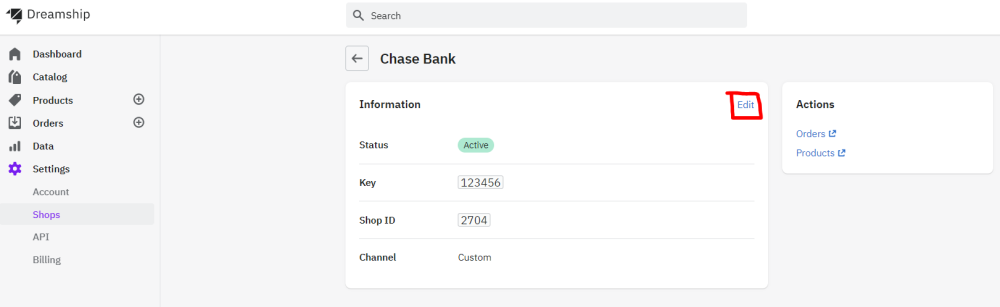
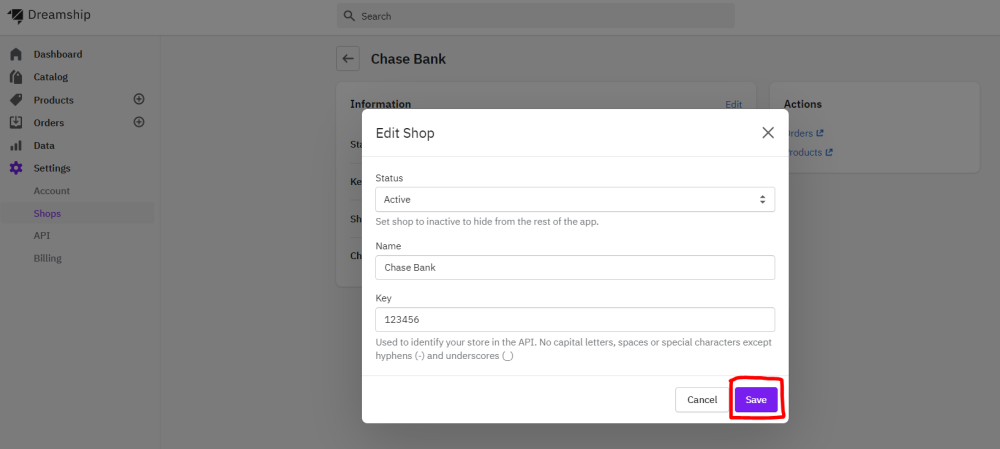
5. Make desired edits & click “Save”
-
Status - you can change the Status of a shop from “Active” to “Inactive”
-
Note - changing the status of a shop from “Active” to “Inactive” will hide the shop from the rest of the app
-
-
Name - you can change the Name of your shop at anytime
-
Note - this might be relevant if a client ever changes their name or merges with another company
-
-
Key - you can change your Key at anytime.
-
Note - this might be relevant if you change how certain things (i.e. catalogs or client stores) are identified within your internal systems
-
How to Publish Products to Shops
How to Publish Products to Shops When Designing:
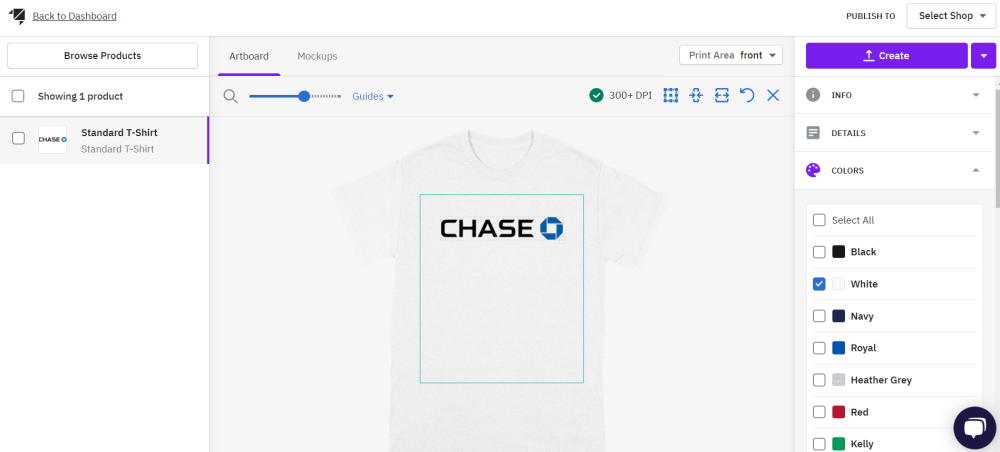
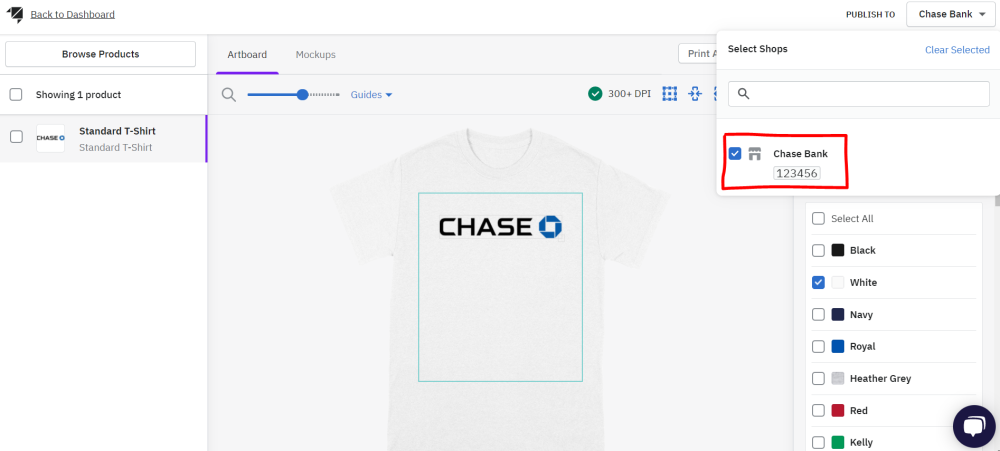
2. Once ready to publish, click “Select Shop” at the top right
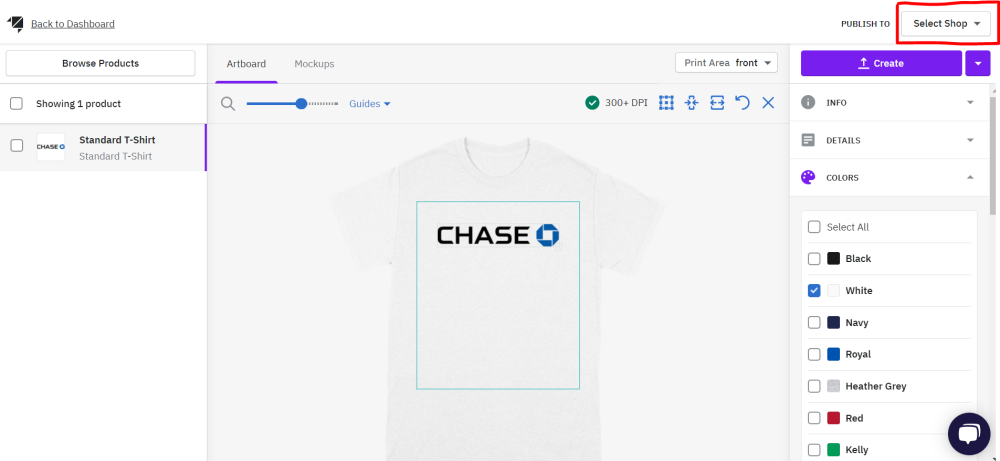
3. Select your desired shop(s) *Note - you can search for your desired shop(s) using the search bar
4. Click “Create & Publish” *Note - you can publish products to multiple shops at once by selecting more than one in the dropdown at the top right *Note - you can also bulk publish multiple products
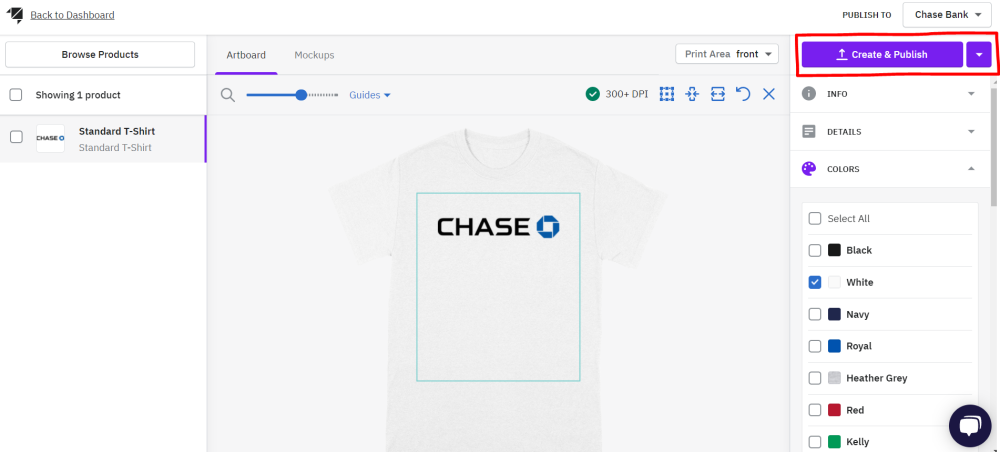
5. Your product will now be created in your “Products” tab and published to your desired shop(s)
How to Publish Products to Shops After they Have Already Been Created:
-
Click “Products”
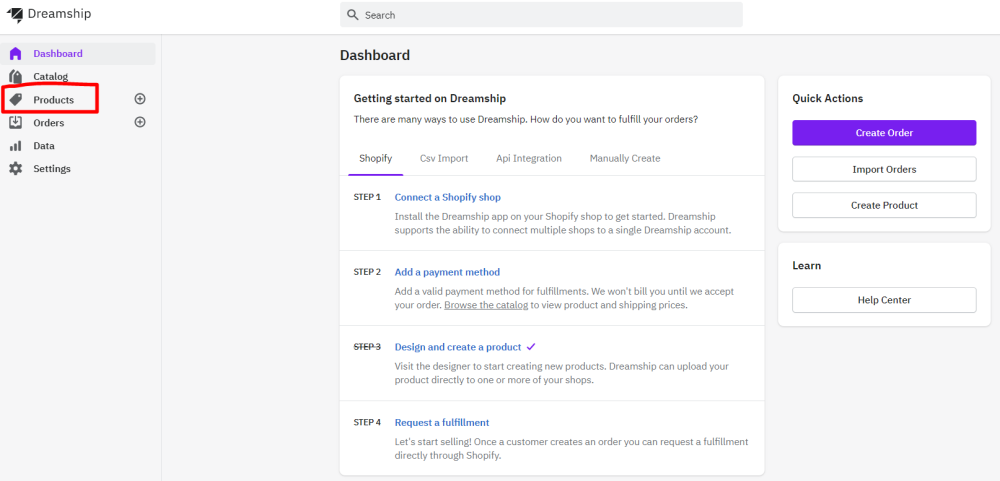
2. Select products that you would like to publish to a shop (or multiple shops)
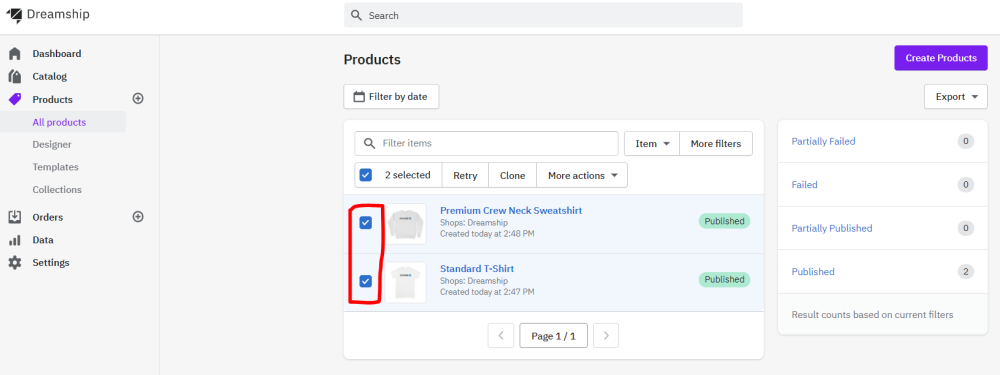
3. Click “More Actions”

4. Click “Publish to additional shops”
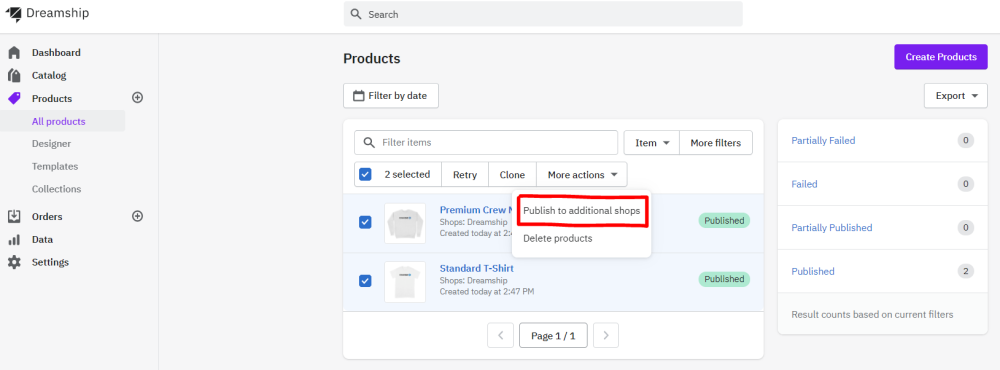
5. Select your desired shop(s) & click “Publish” *Note - you can search for your desired shop(s) using the search bar *Note - you can publish products to multiple shops at once by selecting more than one
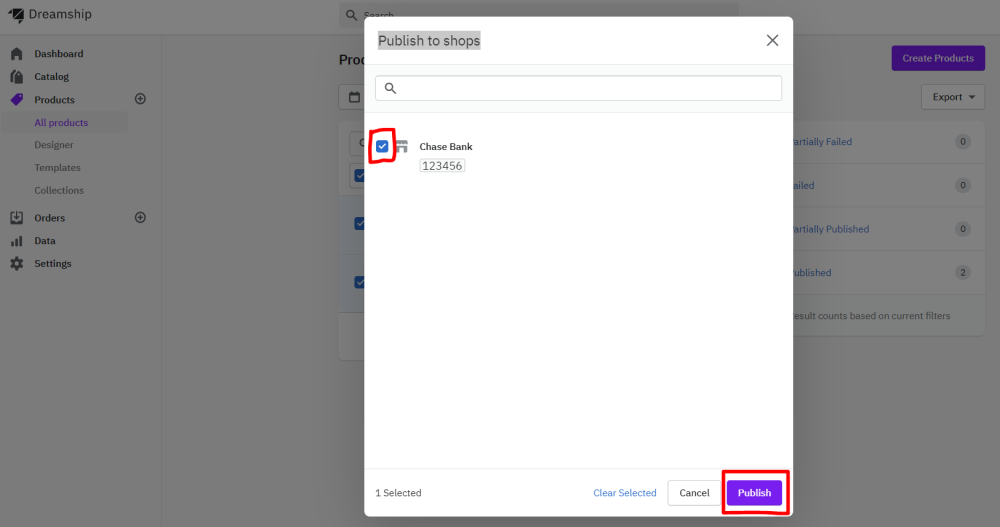
6. Your product will now be published to your desired shop(s)
How to View Products & Orders by Shop:
Option 1 - View products via your shop
-
Click “Settings”

2. Click “Shops”
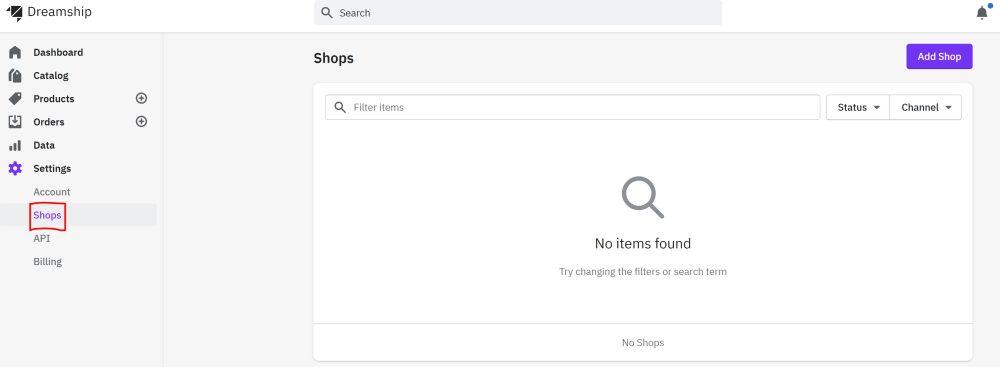
3. Click desired shop *Note - you can search for specific shops using the search bar

4. Click “Products”

5. Your browser will open a new tab to the “Products” tab automatically filtered by the shop you selected

Option 2: - View products via filtering products by shops
-
Click “Products”

2. Click “More filters”

3. Click “Shop”
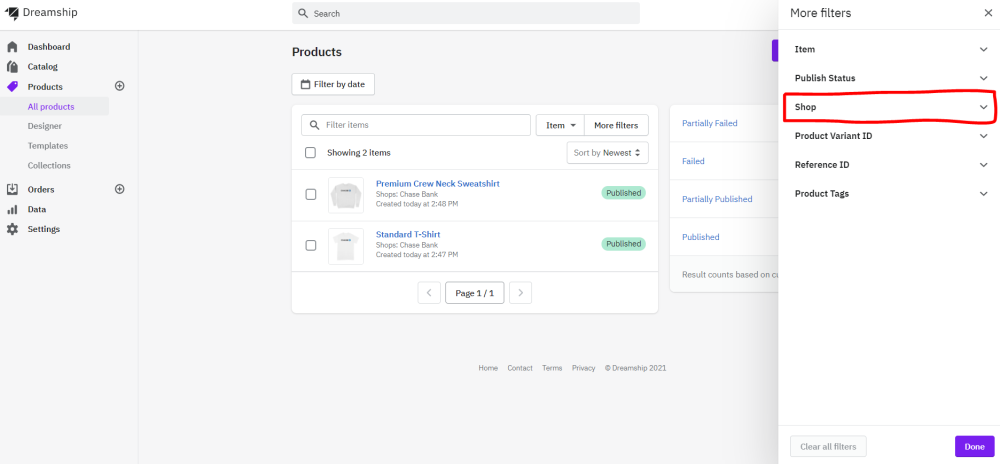
4. Type your desired shop in the search bar, select the name when prompted & click “Submit” *Note - the search bar is predictive so when you start typing you should see your desired result
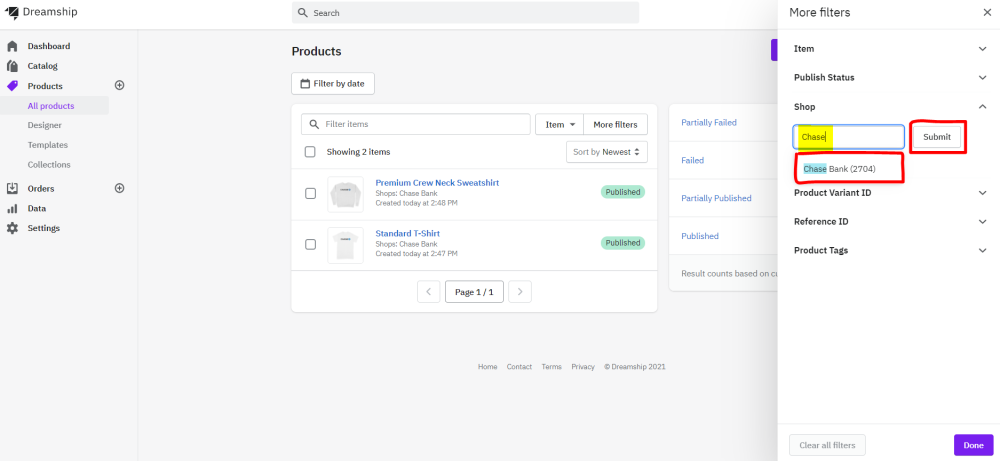
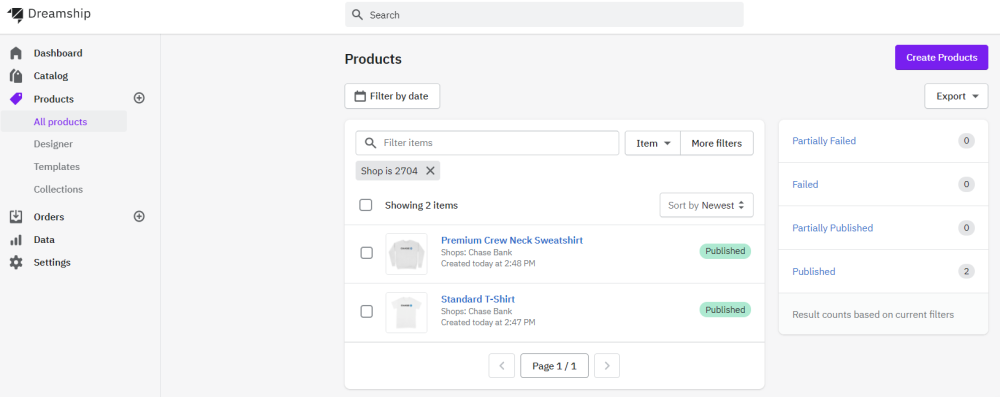
5. You will now see only the products published to your selected shop
How to View Orders by Shop:
Option 1 - View orders via your shop
-
Click “Settings”
2. Click "Shops"
3. Click desired shop *Note - you can search for specific shops using the search bar
4. Click “Orders”

5. Your browser will open a new tab to the “Orders” tab automatically filtered by the shop you selected
Option 2 - View orders via filtering orders by shops
-
Click “Orders”
2. Click “More filters”

3. Click “Shop”
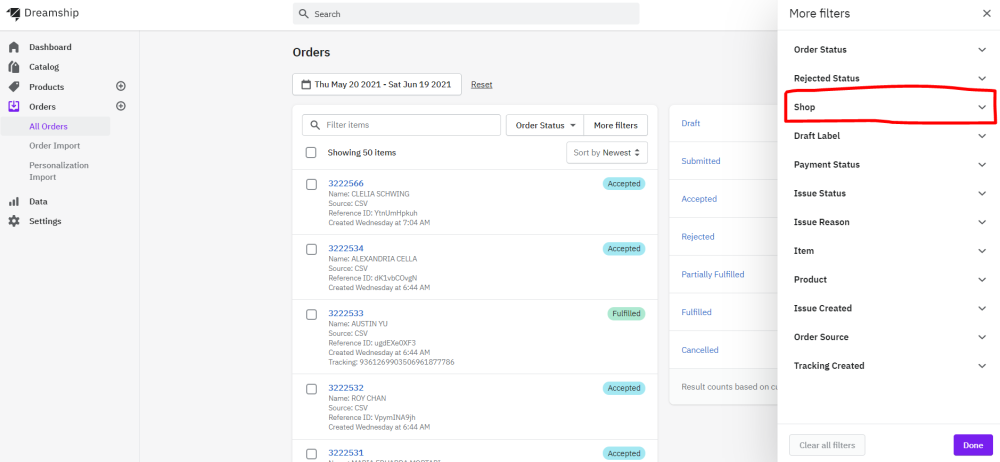
4. Type your desired shop in the search bar, select the name when prompted & click “Submit” *Note - the search bar is predictive so when you start typing you should see your desired result
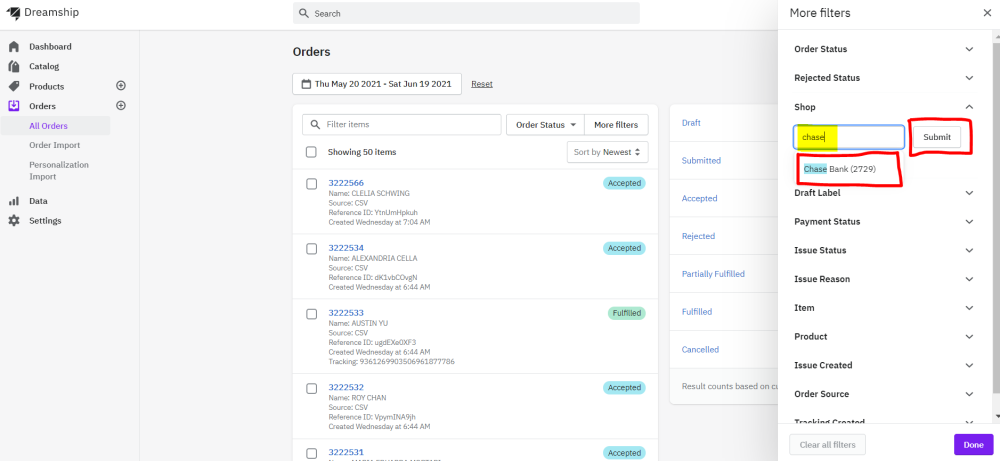
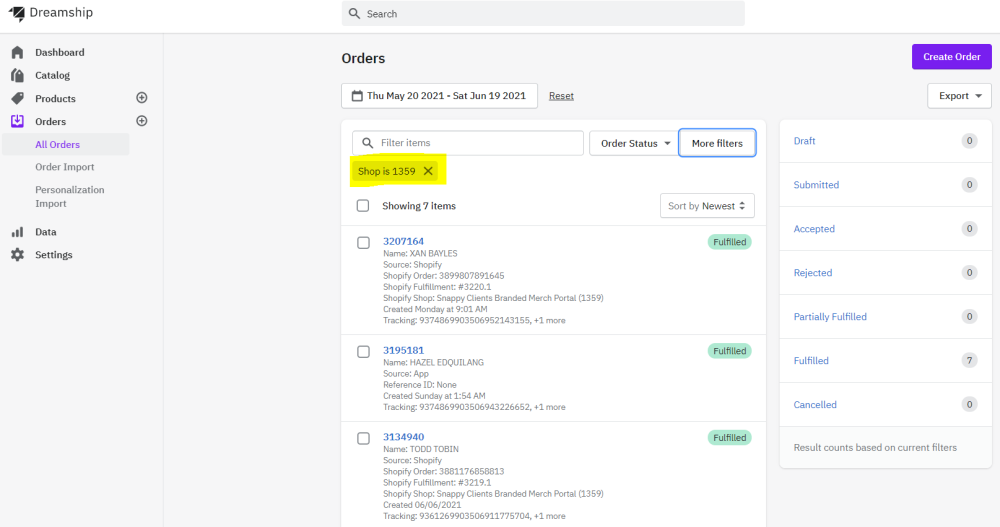
5. You will now see only the orders associated with your selected shop